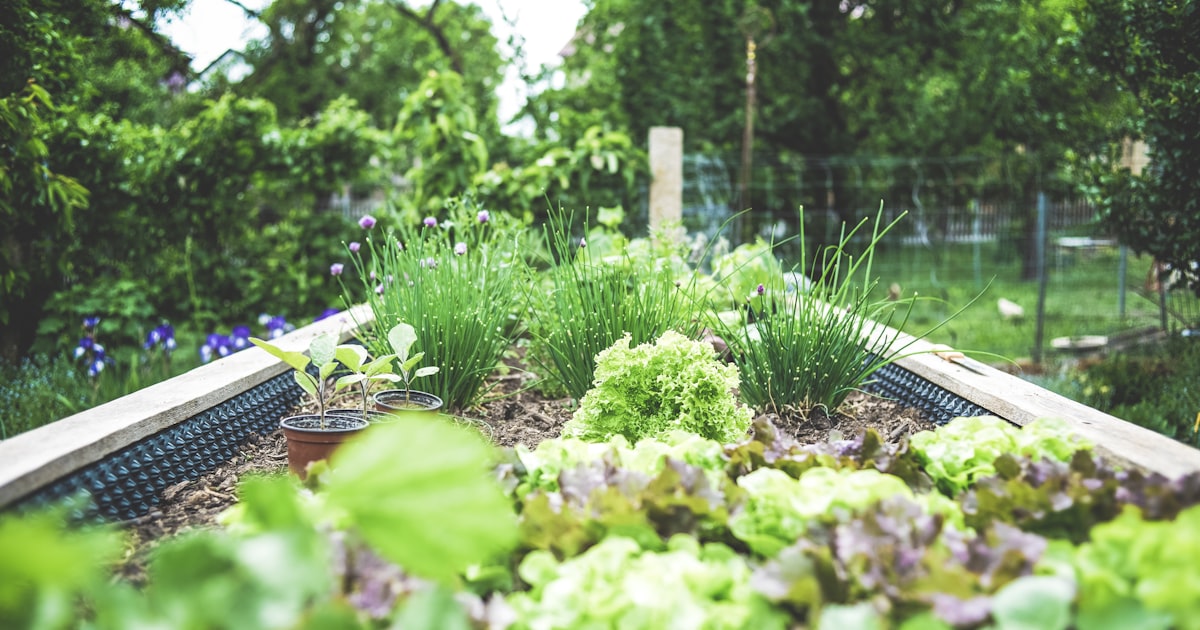
If you have ever tried to dig into typical Australian backyard soil, you know the struggle. Rock-hard clay, sandy nothingness, or mysterious builders’ rubble from when the house was built. This is exactly why raised beds are so popular in Australia. You skip the terrible soil entirely and create your own perfect growing environment from scratch.
Raised beds are not just for people with bad soil, though. They are brilliant for drainage control, accessibility, keeping out some pests, and making your garden look neat and organised. Let us walk through how to build your first one.
Why Raised Beds Are Brilliant in Australia
Poor Native Soil
Much of Australia has soil that is not naturally suited to growing veggies. Heavy clay that waterlogs in winter, sandy soil that does not hold nutrients, or ancient, depleted earth. A raised bed lets you fill in exactly the mix your plants need.
Drainage Control
In subtropical and tropical regions, heavy summer rain can waterlog garden beds. Raised beds drain faster and more consistently. In drier areas, the defined edges help contain mulch and water where you want it.
Accessibility
A raised bed at the right height means less bending and kneeling. For anyone with back problems, mobility issues, or just a preference for comfortable gardening, this is a game changer.
Warmth
Raised beds warm up faster in spring than in-ground beds, which means you can get planting earlier in the season. The soil is slightly elevated and exposed to more air on the sides, so it catches the warmth sooner.
Choosing Your Materials
Hardwood Timber
The classic Australian choice. Hardwood sleepers or thick planks (minimum 38mm) are sturdy, look great, and last 10 to 15 years. Go for untreated hardwood if possible. Ironbark, spotted gum, and recycled railway sleepers are popular options.
Corrugated Iron (Colorbond)
Very Australian, very practical. Corrugated iron beds are durable, pest-resistant, and available in loads of colours. You can buy pre-made kits from hardware stores or have a handy mate bend some sheets for you. They heat up in summer, so line the inside with shadecloth or add extra mulch to protect roots.
Recycled and Repurposed
Old bathtubs, wine barrels, concrete blocks, even thick cardboard and straw bales can make perfectly functional raised beds. Recycled materials save money and keep things out of landfill. Just make sure whatever you use has not held chemicals or treated materials that could leach into your soil.
Pre-made Kits
Bunnings, local garden centres, and online retailers sell ready-to-assemble raised bed kits in various materials (timber, metal, composite). These are the easiest option if you are not confident with tools. Just bolt them together and fill.
Size Recommendations
Width
This is the most important measurement. Do not make your bed wider than 1.2 metres. You need to be able to reach the centre from either side without stepping on the soil. Compacted soil is sad soil.
If your bed is against a wall or fence, keep it to 60cm wide so you can reach everything from the front.
Length
Whatever suits your space. Common lengths are 1.8m, 2.4m, or 3m. Just make sure you can walk around all sides for easy access.
Depth
At least 30cm for most veggies. This gives roots enough room to grow and allows for good drainage. For root vegetables like carrots and beetroot, 40cm or deeper is better.
If you are building on top of concrete or paving, go even deeper (45cm minimum) since roots cannot penetrate downward at all.
PLAN YOUR GARDEN BEDS
Design your raised bed layout in the app
VeggieCrush helps you plan what to plant in your raised beds based on your space, climate zone, and what you love to eat.
Download the free appHow to Fill Your Raised Bed
Do not just dump in potting mix and call it done. A layered approach gives you better results and saves money on expensive soil.
The Layering Technique
Bottom layer (optional, for deep beds over 40cm): Chunky organic matter. Small branches, twigs, old woody prunings. This breaks down slowly and provides drainage and aeration. Some people call this the hugelkultur layer.
Middle layer: Aged compost, leaf litter, old straw, or well-rotted manure. This is the bulk filler that will continue to break down and feed your plants over time.
Top layer (at least 15-20cm): High quality garden soil or a veggie garden mix. This is where your plants’ roots will be most active. Most landscape suppliers sell a “veggie mix” or “raised bed mix” that blends soil, compost, and sometimes sand for drainage.
The Quick and Simple Method
If layering feels like too much effort, just fill the whole bed with a good quality veggie garden mix from your local landscape supplier. Order it by the cubic metre (measure your bed’s volume: length x width x depth). It is not cheap, but it is easy.
Positioning for Sun
Most vegetables need at least 6 hours of direct sunlight per day. Before you build, observe your yard at different times of the day and note where the sun falls.
In Australia, a north-facing position gets the most sun year-round. Avoid positioning beds under large trees or on the south side of the house where shadows linger.
If you only have a partially shaded spot, you can still grow leafy greens, herbs, and some root veggies. You just will not get great results from sun-loving crops like tomatoes and capsicums.
Budget Options
Not everyone can splash out on a full timber raised bed setup. Here are some cheaper alternatives that work surprisingly well.
Straw Bale Gardens
Buy a few straw bales, arrange them in a rectangle, condition them with nitrogen fertiliser and water for 2 weeks, then plant directly into the top. The bales are the bed AND the growing medium. They last one season, then you compost the whole thing.
Fabric Grow Bags
Large fabric pots (50L to 200L) make excellent temporary raised beds. They are cheap, portable, and provide great drainage. Perfect for renters or anyone who is not sure where they want their permanent garden yet.
No-dig Garden Beds
Layer cardboard, straw, compost, and manure directly on the ground in a mound shape. No frame required. This is the laziest, cheapest way to create a garden bed, and it works brilliantly.
Concrete Block Beds
Stack concrete besser blocks in a rectangle. No mortar needed for a single-height bed. The blocks are heavy enough to stay in place, and the hollow centres can be filled with soil and planted with herbs.
NEW GARDEN? START HERE
Set up your garden in the app and get planting
VeggieCrush walks you through setting up your first garden, from bed layout to your first planting plan. It is like having a gardening mate in your pocket.
Download the free appBuilding a Simple Timber Raised Bed
Here is a basic build for a 2.4m x 1.2m x 30cm bed using hardwood.
Materials:
- 4 x hardwood boards, 200mm x 38mm (2 at 2.4m long, 2 at 1.2m long)
- 4 x hardwood corner stakes, 50mm x 50mm x 400mm
- Galvanised screws (75mm)
- Weed mat or cardboard (for the base)
Steps:
- Level your chosen spot and remove any weeds or grass.
- Lay cardboard or weed mat on the ground to suppress weeds growing up.
- Screw the corner stakes to the inside corners of the shorter boards.
- Attach the longer boards to the corner stakes.
- Check the frame is level and square (measure diagonals; they should be equal).
- Fill using the layering technique described above.
- Water the bed thoroughly and let it settle for a few days before planting.
Total cost: roughly $80 to $150, depending on timber prices in your area. Landscape supply soil mix will be an additional cost depending on volume.
The Bottom Line
A raised bed is one of the best investments you can make in your garden. It gives you control over soil quality, drainage, and growing conditions in a way that digging into your existing backyard soil just cannot match. Whether you build a beautiful hardwood frame, repurpose some corrugated iron, or simply pile up straw bales and compost, the principle is the same: create great soil, give it sunshine, and grow something delicious.
Your future self, harvesting armfuls of fresh veggies from a bed you built yourself, will be very pleased with today’s version of you.
Get the VeggieCrush App
Join thousands of Aussie gardeners growing better with personalised planting reminders, pest alerts, and expert advice.
Available for iOS. Android COMING (not available yet). No credit card required